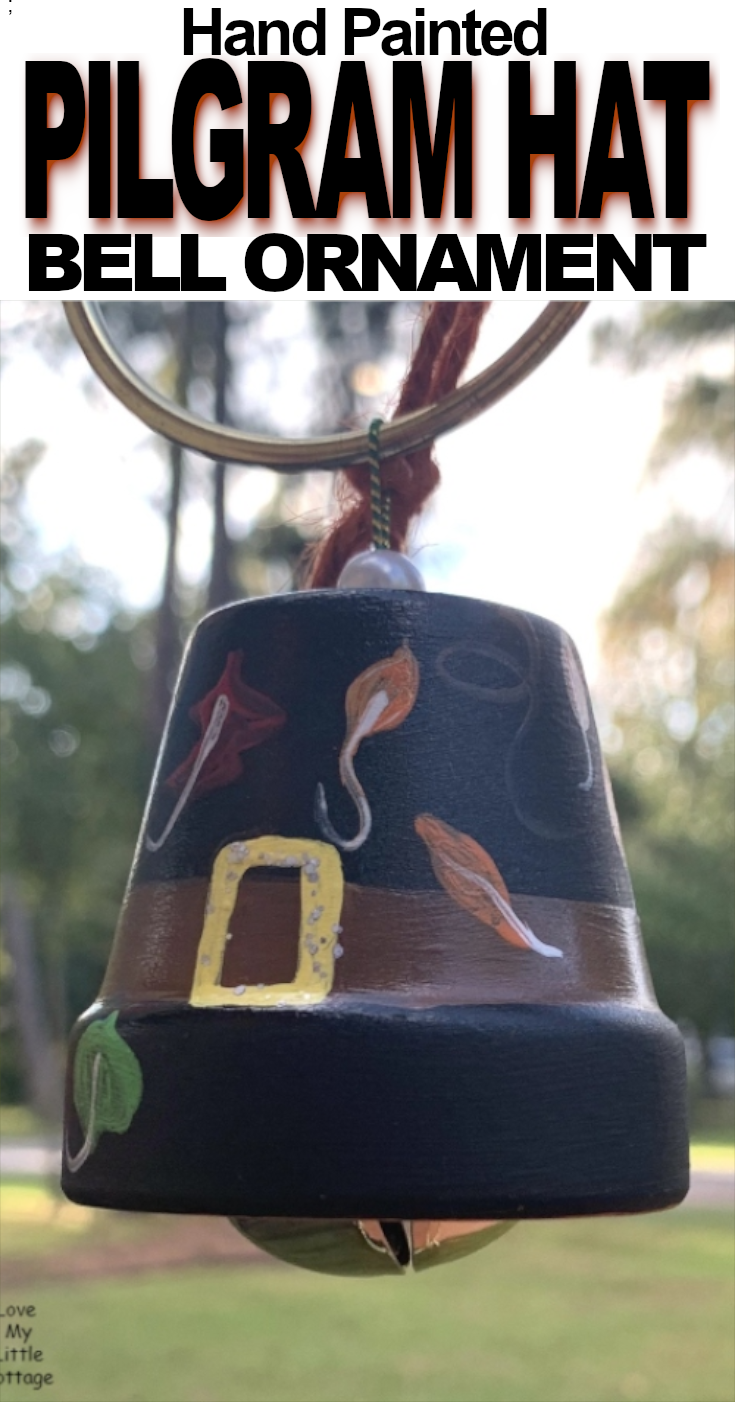
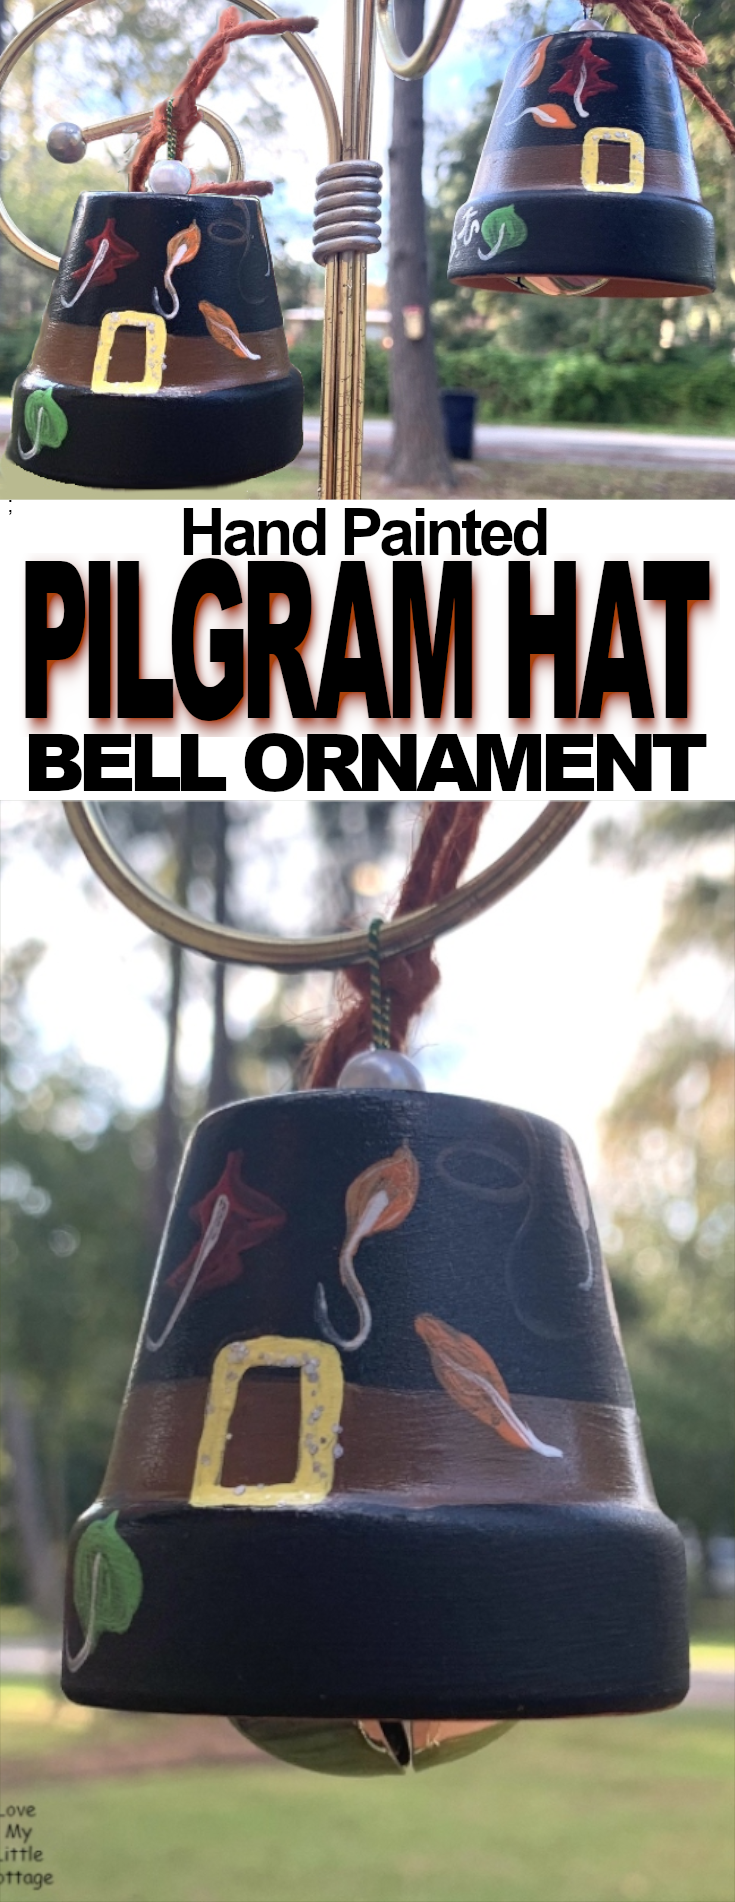
Pilgram Hat Bell Ornaments are a festive decoration for your Thanksgiving table. If your looking for a crafy Thanksgiving project, these terra cotta Pilgram Hats outta’ do the trick. They require just a few inexpensive items, a little time and a touch of holiday cheer.
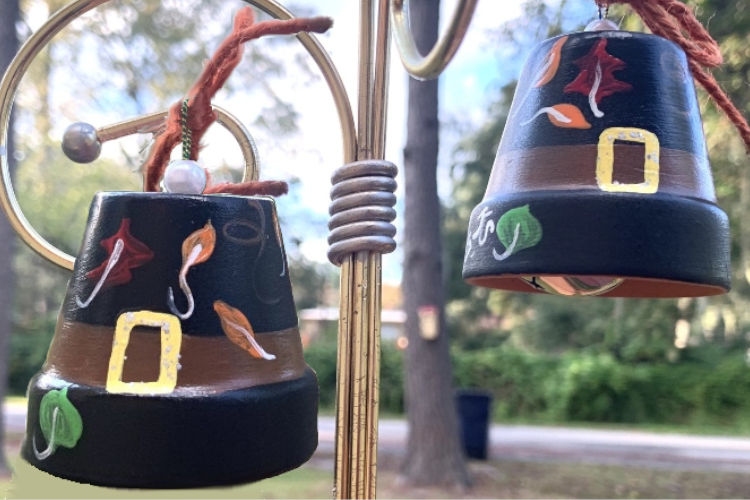
I’ve always been fascinated by the Pilgrims. I couldn’t imagine boarding a tiny boat, then traveling across the Atlantic Ocean in 1620. I would barely consider doing that now! Imagine arriving in a strange place after a long journey, with no one to welcome you. There were no houses, hospitals, hotels, or restaurants- not even a 7- Eleven. Yet, they had faith that God would sustain them. That’s why they’re rock stars in my eyes. My humble Hand Painted Pilgrim Hat Bell Ornament pays homage to the amazing hosts of our very first American Thanksgiving.
MATERIALS NEEDED

▪ 2” terra cotta flower pot
▪ Apple Barrel Paint – black #20404, pumpkin orange #20359E, hot rod red #20637E, real brown #20354E, bright green #20361#, light yellow #44845E
▪ DecoArt Americana Snow White
▪ Deco Art Galaxy Glitter Silver Moon (I was given free paint by DecoArt for a Christmas post – the Galaxy Glitter is amazing!)
▪ 1” sponge brush
▪ 1/4” flat paint brush
▪ liner brush
▪ 1” silver jingle bell
▪ 8” metallic stretch cord
▪ 8” rust orange jute string
▪ pearlized bead
▪ 1” piece of a reusable Pioneer Woman straw
▪ acrylic sealer (get one with a gloss finish)
-
MORE IDEAS YOU’LL LOVE
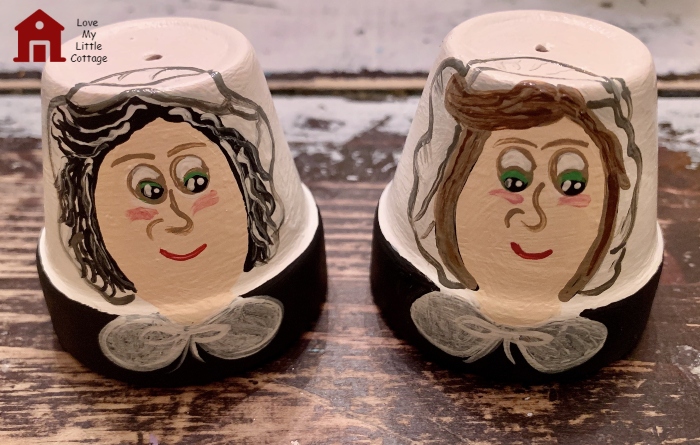 HAND PAINTED PILGRAM BELL ORNAMENTS
To honor those four women who prepared the very first Thanksgiving dinner, I made these fun bell ornaments. I’ll be setting them out as decorations for this years feast…. continue reading
HOW TO PAINT A PILGRAM HAT BELL ORNAMENT
Step 1: Using the 1” sponge brush, paint the flower pot with 3 coats of Black. Let everything dry. You can rush things along with a blow dryer if desired.
Step 2: Paint a Real Brown band below the rim of the pot with the 1/4” paint brush. The band will need several coats of paint.
Step 3: Paint a Light Yellow buckle with the liner brush.

Step 5: Once the ornament is completely dry, take it outside and spray it with acrylic gloss spray.
Step 6: Now its time to turn this flower pot into a bell! Place the 8″ metallic stretch cord through the loop on top of the 1″bell. Slide a 1″ piece of a Pioneer Woman reusable straw over the cord. This will keep your jingle bell where it’s supposed to be, rather than allowing it to slide into the flower pot when hung. My Jack-of-all-trades husband came up with this genius idea. Tie the cord, like you would tie off a balloon.
RELATED: Blue Fall Hand Painted Flower Pot
Step 7: Push the metallic stretch cord string through the hole in the top of the flower pot from the inside. Slip the cord through a pearlized bead. Run the 8″ rust orange jute string between the top of the pearl and the knot on the metallic cord. Tie a bow (tightly!) with the jute string.
You’re all finished! I hope you enjoyed my Hand Painted Pilgrim Hat Bell Ornament tutorial!

Passionate about all things domestic, as a Christian wife and homeschooling mother of 5 children, I am especially interested in encouraging stay-at-home moms, one-income families, and cottage dwellers of all kinds. I love DIY projects, sewing, decorating, cooking, and collecting and selling vintage dishes. Read More…
If you enjoyed this post, subscribe to Love My Little Cottage and receive every post by email.
Happy Thanksgiving!
Kristie
_______________
RECENT POSTS FROM LOVE MY LITTLE COTTAGE
- Frightful Night Classic Pumpkin Pie
- Shining Bright Haunted House Halloween Tablescape
- Spooky Loofa Dog Halloween Costume
- Easy Haunted House Centerpiece
- It’s Finally Fall at Our Little Cottage
- Very Scary Red Velvet Birthday Cake
_______________
RECENT POSTS
 |
 |
 |
 |
 |
 |
_______________
CATEGORIES
BDIY ProjectsB BFallB BUpcycleB
Disclosure: Some of the links in this post are affiliate links. If you click on the link and purchase the item, I will receive a commission. I only recommend products or services that I personally believe will add value to my readers. All opinions stated are strictly my own. Read our full disclosure policy for more information.

That is so pretty!!! I love this!
Thanks, Michelle!
So cute! Thank you for sharing at The Really Crafty Link Party this week. Pinned!
Thanks, Teresa!
I love this cute idea! SO cute and fun for the kids!
Thanks so much for the encouragement!
This came out really nice and I love the idea! Thanks for sharing it with us at #OMHGWW
Thanks for hosting, Alice!