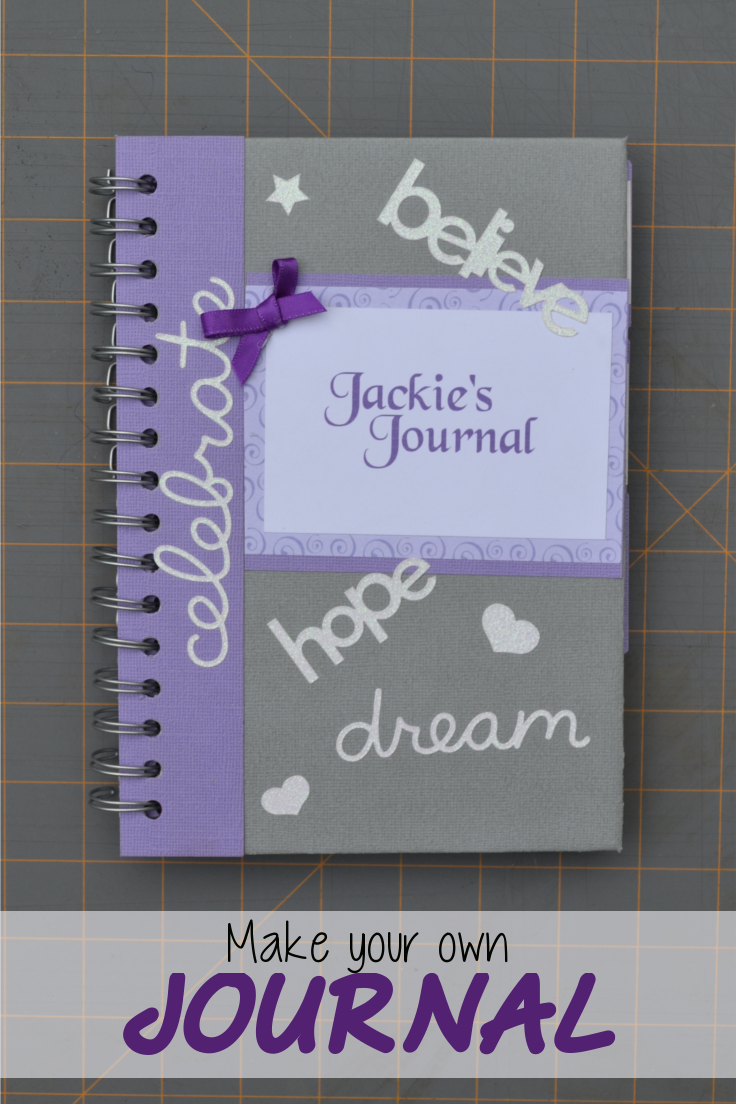
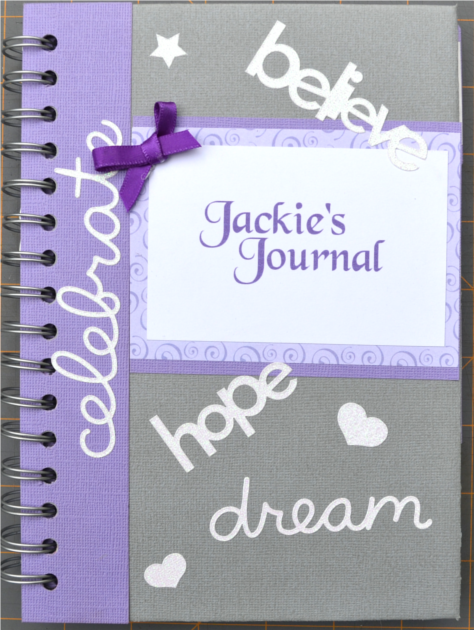
DIY Personalized Journal. With these simple to follow steps you can create a personal journal that shows off your individuality, or, create them as personalized gifts. I made this journal as a medical journal for a friend with brain cancer. #journals #tutorial #stationery #diary #crafts
Back in February I read an article on my friend Holly’s blog, The Coconut Head’s Survival Guide about creating Medical Journals for loved ones dealing with cancer or illness. The article was actually a guest post written by Susan who blogs over at Organized 31. I was so touched by the thoughtfulness of such a gift that I filed it in the back of my mind in case I ever needed it.
Now I’ve been making personal journals for several years as Christmas gifts for my nieces. In fact, it’s something that they all look forward to every year, but it wasn’t until recently that I created my first medical journal.
In May 2013, a dear friend of mine was diagnosed with a rare brain cancer. Throughout the surgeries and treatments she always had a positive attitude, one worth admiring. I think that it was that attitude that made her quick recovery so amazing.
Since her surgery she has had to have bi-monthly follow-ups and everything has been great, until last month. The doctors discovered that she had two new tumors, one in the area of the brain that controls speech and the other in the area of your brain that controls emotions. Over the last month she has had more tests than you can count, preparing her for surgery on July 9th and in that time the tumors have doubled in size. This is the reason for creating my first and hopefully last medical journal.
This tutorial can be used for any kind of a journal, not just for a loved one dealing with illness.
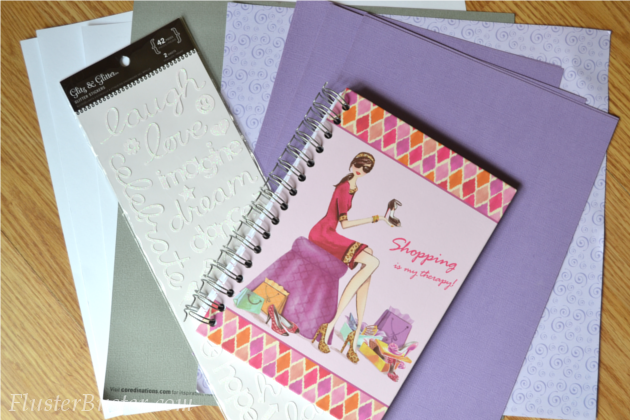
Supplies Needed:
*Most of these items can be found in the scrapbook section of your favorite craft store.
1 – (5 x 8 1/2) Spiral notebook (with easy to remove spiral binding)
4 – (8 1/2 x11) sheets of card stock
2 – (12 x 12) sheets of card stock
2 – (12 x 12) sheets of white card stock
spray adhesive
self-adhesive labels
Embellishments
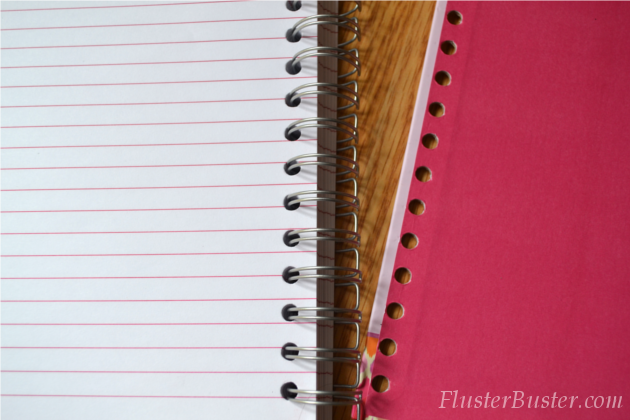
First things first, disassemble the notebook, being careful not to tweak the spiral binding to much.
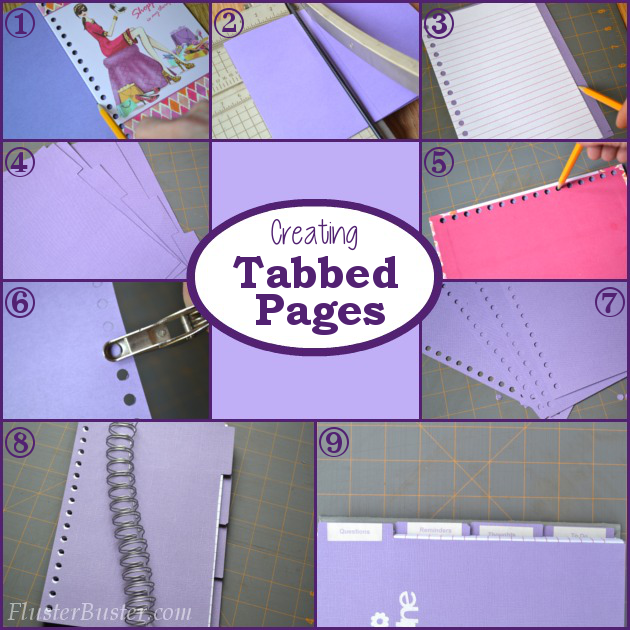
Creating Tabbed Pages
If you plan on including tabbed sections in your journal follow these steps, otherwise move on to the Creating the Covers section. **I included tabbed sections for this tutorial to help make life a little easier for my friend since the tumors are also affecting her memory.
- Use the cover from the spiral notebook as a template for making your tabbed pages from the 4 pieces of 8-1/2 x 11 card stock.
- Cut to size.
- Use the lined pages from the notebook as a template for creating the tabs. *The lined pages will be smaller than the cover. The difference between the size of the cover and the lined pages will create your tabs on the card stock.
- In the area where the tabs will form cut out a 1/4″ section from the top and bottom corners of each sheet of card stock. Then, on the first sheet of card stock, measure down 2″ from the top 1/4″ cut and cut away the rest, This will create your first 2″ tab. Repeat this with the second sheet of card stock this time making a measurement at 2″ and 4″. Cut away the area above the 2″ mark and below the 4″ mark. This will create your second 2″ inch tab. Repeat these steps for the remaining 2 sheets making your marks at 4″ and 6″ for the third sheet and 6″ for the fourth sheet.
- Use the cover as a template for determining where the binding holes are to be positioned. Make sure that the holes are being marked on the opposite side of the tabs. Mark each hole using a sharp pencil.
- Using a hole punch, carefully punch the holes being sure to keep them as aligned as possible.
- This is how it should look when you are finished.
- Divided the lined sheets of paper equally into 4 piles and top each pile with one of your tabbed sheets.
- Label the tabs. *For this journal I labeled the tabs: Questions (for the doctor), Reminders, Thoughts, To-Do
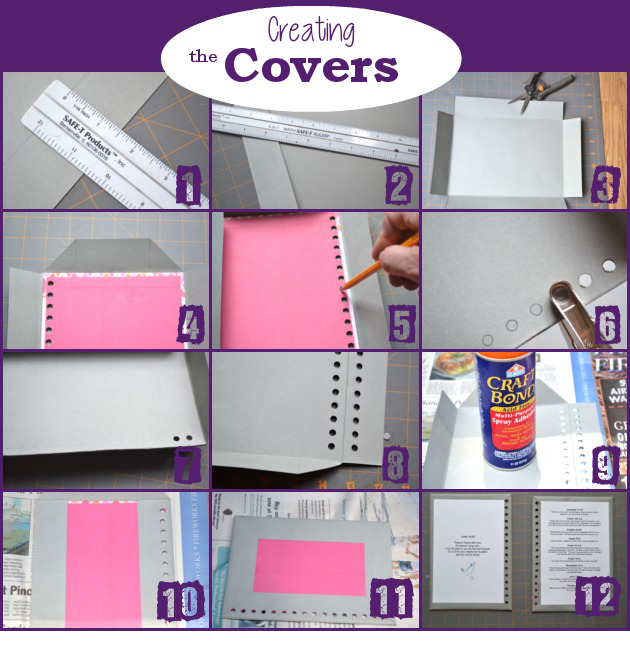
Creating the Covers
These steps are to be repeated for both the front and back covers.
- Center the notebook cover on a piece of 12″x12″ card stock. Using a sharp pencil trace around the cover. Use a ruler to measure out 1-1/2″ from the traced lines that you drew. Now, cut along the 1-1/2″ marked line.
- Make a crisp fold at each of the traced lines.
- Cut out a square measuring 1-1/2″ x 1-1/2″ from each corner of the sheet.
- On the top an bottom flaps (small flaps) cut each side at an angle (as shown in image 4).
- Place the notebook cover inside the folded card stock. Use a sharp pencil and mark the placement of the holes.
- On the side where you marked the holes fold the flap under. Using a hole punch, carefully punch the holes being sure to keep them as aligned as possible.
- Punching the holes will be a little difficult because you are punching through 2 layers of card stock.
- This is how it should look when you are finished.
- Following the direction on your can of spray adhesive, spray the inside of the card stock. Gently, center and secure the notebook cover to the card stock being sure that the binding holes align.
- Folder over and secure the longer flaps, again being sure that the binding holes align.
- Fold over and secure the top flaps.
- Cut out (2) 4-1/2″ x 7-1/2″ sheets from the 12″x 12″ white card stock. This is used to dress up the inside covers. *Before adhering to the covers I printed some healing scriptures on them for my friend.
Love this idea, it looks great. Thanks for sharing it with us today. Have a great 4th of July. 🙂
Beautiful and very thoughtful.
Great idea! I love journals and notebooks, I think I need like 10 of these!
This is such a thoughtful and useful gift from the heart! I hope your friend is doing well. Thanks for sharing on busy Monday.
This is an awesome idea and would make a marvelous gift! I appreciate you sharing with Home and Garden Thursday,
Kathy