
Have you checked out Mod Podge products lately, they have some pretty fun stuff to create with. This summer I was given the opportunity to use the Mod Podge Collage Clay, Mod Molds and Mod Melts to create a Decoden project. I chose to make a Memory Box to hold some special keepsakes from my wedding. For Halloween I’ve been asked to create something decorative using the items pictured below. Since I have a house full of boys who love the creepy and scary, I decided to do something a little ominous, a Book of the Dead.
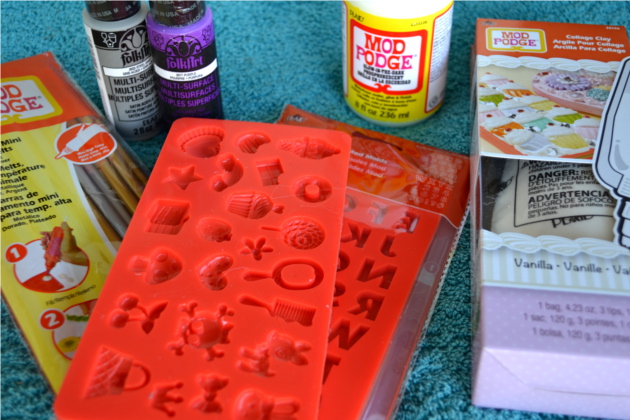 Collage Clay | Mod Melts | Mod Molds | Mod Podge Glow-in-the-Dark | Mod Podge Silicone Craft Mat | Folk Art Multi-Purpose Paint
You’ll Need:
- 1 hardcover book
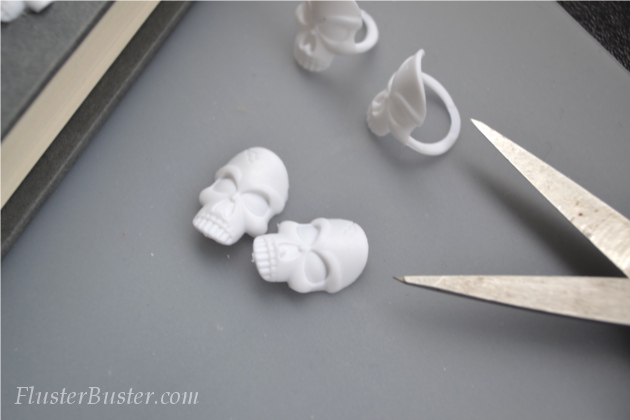
- 20 plastic skull rings
- Mod Podge Silicone Craft Mat
- Mod Molds
- Mod Melts
- Sandpaper
- Spray paint
- Mod Podge Glow-in-the-Dark
Step 2
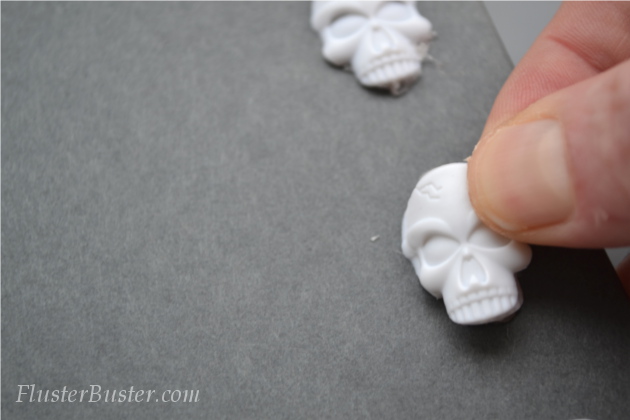
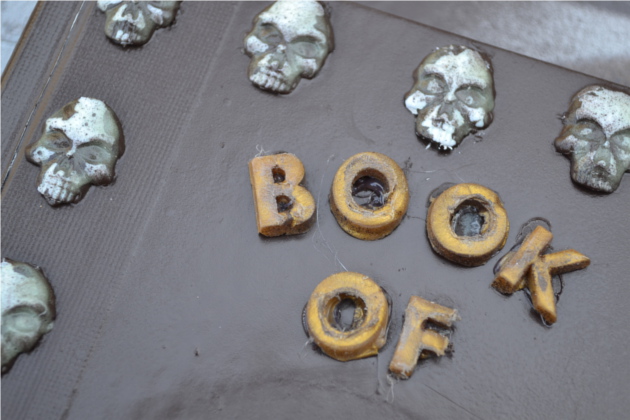
Using hot glue, attach the skulls to the perimeter of the book cover, being sure to space them evenly.
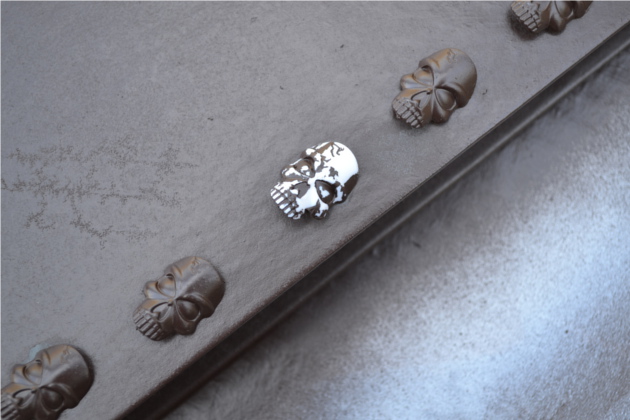
Step 3
Using spray paint, paint the cover of the book. Let the paint dry completely, then scrape some of the paint off of the skulls (I used my fingernail). Don’t remove all of the paint, the paint is what gives each skull it’s own unique character.
Step 4
This is where it starts getting fun! Load your glue gun with one of the Mod Melt sticks. When the stick is hot enough begin filling in the letters of your Mod Mold. Let the letters cool for about 5-10 minutes before removing, then trim.
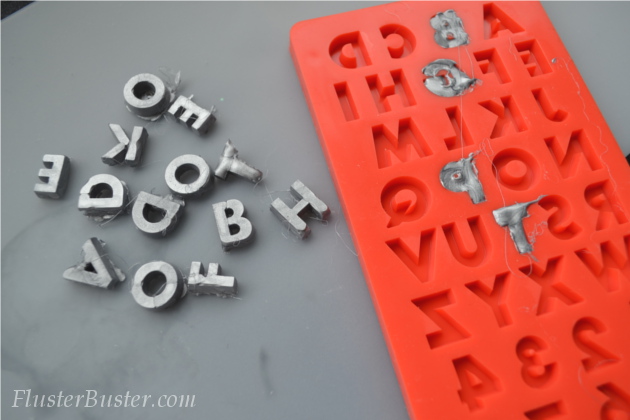
Step 5
To age the letters, spray them with spray paint, let dry and then scuff them up using sandpaper. Once you’ve finished aging all of the letters attach them to the book cover using hot glue.
Step 6
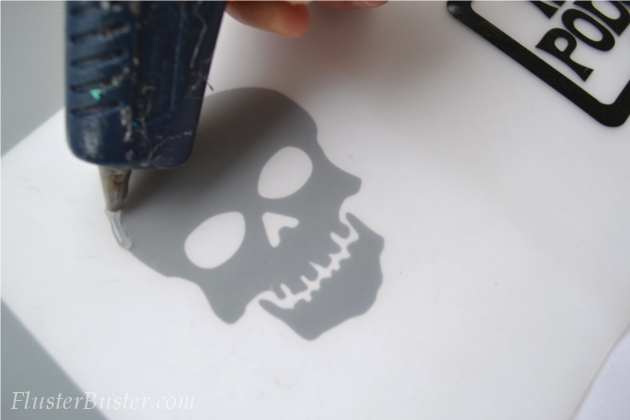
Now this part was really fun! Find a picture of a skull online and print it. Now place the image under the Mod Podge Silicone Craft Mat. Using a glue gun and a few Mod Melts fill in the image. Once it has completely dried remove it from the craft mat and attach to the book cover using hot glue.
**The Mod Podge Silicone Craft Mat is absolutely amazing, nothing sticks to it, I mean nothing. I got a little paint on it and I just wiped it off with a little soap and water and it looked like new. From now on I’ll be using it whenever I do any crafts.
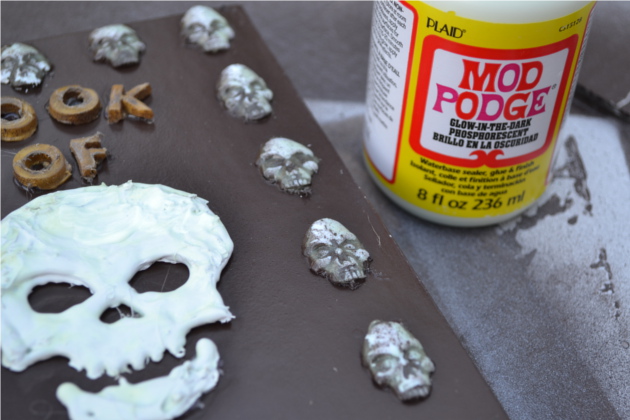
Step 7
This is the final step! Using a paint brush, apply the Mod Podge Glow-in-the-dark to all of the skulls and lettering. Apply three coats, letting it dry completely between coats.
**The directions on the jar said, the more coats the better the results. It worked so well that I actually think I could have got away with just one coat.
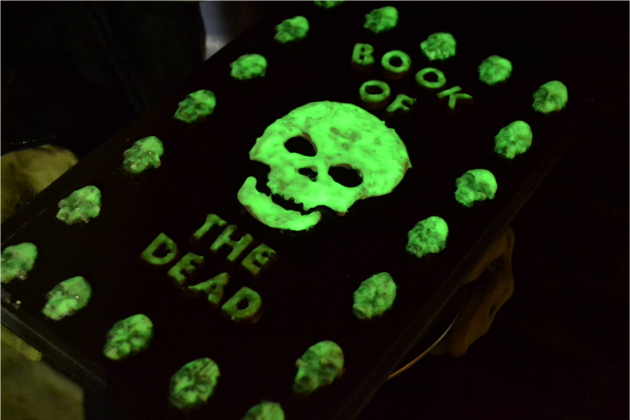
And this is how it will look, in all of it’s glowing glory!
**I’ve used other glow-in-the-dark products and was never happy with the results, so when I received the Mod Podge Glow-in-the-Dark I wasn’t expecting much. You can see by the results, Mod Podge knocked this one out of the park!
Check out some other great Mod Podge projects and ideas:
- DIYFaux Sugar Skulls with Collage Clay by Mod Podge
- 3 DIY Decoden Cell Phone Cases with Mod Podge+ Dollar Store Jewelry
- PlaidBlog – Introducing Mod Podge Modeling Clay
- YouTube – Mod Melt SpiderWebs
- Plaid Decoden PinterestBoard
- DecodenMemory Box
Learn more about Plaid Crafts
Oooh! That's quite spooky! I think I might need to put that mat on my holiday wish list. Thanks for sharing at the Make it Monday party.